Thursday, January 13, 2011
The Versatile Blogger Award!
Oh my goodness - how exciting! My first Blog award! I'm pretty pumped that my friend Jen over at Little Wife Power House picked me!! Check her blog out and read about her sweet baby boy Holden.
The requirements of the award are that I tell 7 things about myself. So...
1. I have been saved by grace, and want to serve the Lord in all I do!
2. I have the best family in the world. I love my husband will all my heart and I am such a proud momma to my little man.
3. I love pretty things! I used to say I'd take pretty over functional any day.... and then I had a baby and realized I can't function without functional.
4. I have 1/2 of my interior design degree. Actually over half - 30 hours to go. I would love to go back and finish it!!! BUT... I do have my BBA in marketing (not quite as fun).
5. I am a goof! My husband and I can have a conversation that makes no sense at all, about nothing at all, but can laugh so hard we cry.
6. I always joke with my husband that I'm a dork at heart. I LOVE spreadsheets, checklists, to-do lists - I'm into the details.
7. I love that I can look around our home and know that I got a good deal on 95% of the things in it. It's such a good feeling!
The second requirement is that I pass it on to three other blogs, so I picked my three favs:
1. The newest blog I'm following is My Lips Will Glorify You. She's into Fashion, Home Decor and Crafts!
2. I recently came across Little Miss Momma's Blog. She talks about her adorable little man, and she has some super cute things on etsy!
3. Oh the House of Smith's. She is so inspiring. She does some amazingly beautiful things with her home! Her blog had my whole family cracking up one night!
Thanks so much Jen for the award!
Wednesday, January 12, 2011
Weekly Cleaning Schedule
I made this cleaning schedule about 4 months ago, and tried a variety of ways to keep track of it.
First, I tried to keep an excel spreadsheet saved on my computer for each week. I learned that I'm more of an out of site out of mind kind of person and would always forget to update it. Then I tried printing it out every week, which ended up getting lost around the house, and seemed like a waste of paper. I thought about doing the planner. But, finally came up with this solution!
This little guy sits right next the fridge in the kitchen, with my laminated schedule on it. Here is the weekly schedule I use for cleaning. I actually call them my "activities". It just sounds more fun than "cleaning". Blah.
I haven't figured out how to link up documents, but if you want the excel file send me your e-mail address and I'll send it over to you!
You can find self laminating sheets at Wal-mart that look like this. They're about $1 each.
I printed mine on pretty paper, followed the 3M laminating instructions, and then cut it down to the size I needed. When you cut be sure and leave at least 1/4 inch around the seam or it will break the laminating seal.
Now I'm able to re-use this same page and use a dry erase marker to cross things out!
You can go here to read more about how I made the magnet board.
First, I tried to keep an excel spreadsheet saved on my computer for each week. I learned that I'm more of an out of site out of mind kind of person and would always forget to update it. Then I tried printing it out every week, which ended up getting lost around the house, and seemed like a waste of paper. I thought about doing the planner. But, finally came up with this solution!
This little guy sits right next the fridge in the kitchen, with my laminated schedule on it. Here is the weekly schedule I use for cleaning. I actually call them my "activities". It just sounds more fun than "cleaning". Blah.
I haven't figured out how to link up documents, but if you want the excel file send me your e-mail address and I'll send it over to you!
You can find self laminating sheets at Wal-mart that look like this. They're about $1 each.
I printed mine on pretty paper, followed the 3M laminating instructions, and then cut it down to the size I needed. When you cut be sure and leave at least 1/4 inch around the seam or it will break the laminating seal.
Now I'm able to re-use this same page and use a dry erase marker to cross things out!
You can go here to read more about how I made the magnet board.
Burlap Magnet Board
I've seen these magnet boards all over blogland. I'll show you how I did mine, but you can find additional tutorials here and here.
I bought the frame 40% off at Hobby Lobby. I bought the fabric from the Et Cetera shop - $.10 each! Can't beat that!!
The first thing I did was stamp the burlap using a very advanced and highly technical method of stamping (not really... you can read about it here.)
Then I cut my burlap to the size I needed for the frame.
I picked up a tip from the lady at hobby lobby that I use all the time. When I cut burlap I always pull 1 thread out to create a line to cut on. Sometimes the thread is tight and you have to work it down the fabric by bunching the fabric.
I used a cardboard box for the back and cut it down to the size I needed to fit the frame.
I lucked out and found a piece of sheet metal that fit my frame so I didn't have to cut it. I payed around $4 for the sheet. You can also buy larger sheets and cut them to size with tin snips. I attached the cardboard and the sheet metal with hot glue.
I added glue dots to the four corners of the sheet metal to help hold my fabric in place, pulled the fabric tight over the front, and hot glued the edges to the back of the frame.
I thought it needed a little something extra, so I added some green fabric and another scrap of burlap that I frayed.
I love that I can stick things up with a magnet OR stick them underneath the fabric!
I use this board to hold my weekly cleaning schedule, which you can read about here!
I bought the frame 40% off at Hobby Lobby. I bought the fabric from the Et Cetera shop - $.10 each! Can't beat that!!
The first thing I did was stamp the burlap using a very advanced and highly technical method of stamping (not really... you can read about it here.)
Then I cut my burlap to the size I needed for the frame.
I picked up a tip from the lady at hobby lobby that I use all the time. When I cut burlap I always pull 1 thread out to create a line to cut on. Sometimes the thread is tight and you have to work it down the fabric by bunching the fabric.
I used a cardboard box for the back and cut it down to the size I needed to fit the frame.
I lucked out and found a piece of sheet metal that fit my frame so I didn't have to cut it. I payed around $4 for the sheet. You can also buy larger sheets and cut them to size with tin snips. I attached the cardboard and the sheet metal with hot glue.
I added glue dots to the four corners of the sheet metal to help hold my fabric in place, pulled the fabric tight over the front, and hot glued the edges to the back of the frame.
I thought it needed a little something extra, so I added some green fabric and another scrap of burlap that I frayed.
I love that I can stick things up with a magnet OR stick them underneath the fabric!
I use this board to hold my weekly cleaning schedule, which you can read about here!
Fabric Stamping with a Computer Paper Pattern
I am so excited about this method of stamping! I have a feeling this will come in handy on a LOT of projects, and will save a ton of money on stamps and stencils. I used this method on my burlap to-do magnet board, which you can read about here.
Here's how I did it:
First, I found a pattern online (I am really loving the vintage songbirds right now), and printed it off on a medium weight computer paper. I thought about ways I could make a foam stamp from the pattern but decided I would give the paper a shot! I was so pumped when it actually worked! woo hoo! I cut the pattern out and put a layer of acrylic paint on it. I actually used my finger to apply it which seemed like an easier way to make sure it was even and wouldn't have a "goopy" look. It's messy, but here is what it looked like at this point.
Then I plopped it down on the fabric. I didn't use a lot of paint the first time, so I actually did this twice to make it a little darker - it's easier to get more paint on then to take it off once it's there. You can push down as light or as hard as you would like depending how dark you want it to be in that area.
I drew in the legs with a sharpie.
I love the way it turned out! And it has more of a "worn" look than you would get with stenciling.
For the "to-do" I actually used some scrap-booking letters I had on hand, but I really think the paper method worked better!
Here is the finished product! You can read more about the magnet board here.
Here's how I did it:
First, I found a pattern online (I am really loving the vintage songbirds right now), and printed it off on a medium weight computer paper. I thought about ways I could make a foam stamp from the pattern but decided I would give the paper a shot! I was so pumped when it actually worked! woo hoo! I cut the pattern out and put a layer of acrylic paint on it. I actually used my finger to apply it which seemed like an easier way to make sure it was even and wouldn't have a "goopy" look. It's messy, but here is what it looked like at this point.
Then I plopped it down on the fabric. I didn't use a lot of paint the first time, so I actually did this twice to make it a little darker - it's easier to get more paint on then to take it off once it's there. You can push down as light or as hard as you would like depending how dark you want it to be in that area.
I drew in the legs with a sharpie.
I love the way it turned out! And it has more of a "worn" look than you would get with stenciling.
For the "to-do" I actually used some scrap-booking letters I had on hand, but I really think the paper method worked better!
Here is the finished product! You can read more about the magnet board here.
Sunday, January 9, 2011
Color Trends 2011!
One thing I've been dying to do lately is look up all the new color and design trends for 2011! So, here is a rundown of what I've found for color trends, and I am LOVING them!
(Drum-roll please....)
Pantone's 2011 color of the year - Honeysuckle! I've never been a big "pink" person, but I think this year I may venture out of my "comfort colors" and add some pinks. I'm sure the hubby will LOVE that!
From Pantone's press release, "Courageous. Confident. Vital. A brave new color, for a brave new world. Let the bold spirit of Honeysuckle infuse you, lift you and carry you through the year. It’s a color for every day – with nothing “everyday” about it."
I am LOVING this color for room accents - pillows, flowers, vases...
Benjamin Moore's 2011 color of the year - Vintage Wine!
From Benjamin Moore, "First seen on the fashion runways of New York, Paris, and Milan, this rich hue with a deep brown base and a hint of smoky violet is just as magnificent in the home."
Ahhh.... that just sounds dreamy.
Loving their use of this color in this mud room. They are pairing this with an "acidic green", which is also a hot color for 2011 (and one of my personal favs).
ICI Dulux Color of the year - Citrus Yellow!
From ICI Dulux, "The Colour of the Year is a light, airy, citrus yellow that symbolises a freer spirit, sense of fun and positive energy".
I am a huge fan of ANY shade of yellow. It is just such a happy color and can brighten any space! I am definitely trying to figure out ways to incorporate more yellow in our home. I used the fabric below from Joann's when I did my couch pillow revamp.
And I am loving this pillow from Crate and Barrel.
(Drum-roll please....)
Pantone's 2011 color of the year - Honeysuckle! I've never been a big "pink" person, but I think this year I may venture out of my "comfort colors" and add some pinks. I'm sure the hubby will LOVE that!
From Pantone's press release, "Courageous. Confident. Vital. A brave new color, for a brave new world. Let the bold spirit of Honeysuckle infuse you, lift you and carry you through the year. It’s a color for every day – with nothing “everyday” about it."
I am LOVING this color for room accents - pillows, flowers, vases...
Benjamin Moore's 2011 color of the year - Vintage Wine!
From Benjamin Moore, "First seen on the fashion runways of New York, Paris, and Milan, this rich hue with a deep brown base and a hint of smoky violet is just as magnificent in the home."
Ahhh.... that just sounds dreamy.
Loving their use of this color in this mud room. They are pairing this with an "acidic green", which is also a hot color for 2011 (and one of my personal favs).
ICI Dulux Color of the year - Citrus Yellow!
From ICI Dulux, "The Colour of the Year is a light, airy, citrus yellow that symbolises a freer spirit, sense of fun and positive energy".
I am a huge fan of ANY shade of yellow. It is just such a happy color and can brighten any space! I am definitely trying to figure out ways to incorporate more yellow in our home. I used the fabric below from Joann's when I did my couch pillow revamp.
And I am loving this pillow from Crate and Barrel.
Gray will also be very popular in 2011 to offset the bright accent colors. Here are the top 5 from Benjamin Moore.
What other great sites have you found for color inspiration?
Friday, January 7, 2011
Wall Mount Vases
This was a pre-blog project, but it's still one of my favs so I wanted to share! With all of my new year organizing with a bowl full of lemons I haven't had time for too many projects!
I have these wall mount vases hanging above our bathtub in the Master Bath! So simple yet so fabulous!
I actually purchased these wall mount vases from Pottery Barn for about $15/each. I know - ouch! You can also get this same look using mason jars on a shelf, which you can pull off for less than $15!
The bottom of these are filled with coffee. An old trick but a good one. I love decorating with coffee beans, ground coffee and another fav of mine is eucalyptus pods. Eucalyptus pods look great, add texture and best of all they smell amazing! I've found them online for about $2/pound.
I have these wall mount vases hanging above our bathtub in the Master Bath! So simple yet so fabulous!
I actually purchased these wall mount vases from Pottery Barn for about $15/each. I know - ouch! You can also get this same look using mason jars on a shelf, which you can pull off for less than $15!
The bottom of these are filled with coffee. An old trick but a good one. I love decorating with coffee beans, ground coffee and another fav of mine is eucalyptus pods. Eucalyptus pods look great, add texture and best of all they smell amazing! I've found them online for about $2/pound.
Monday, January 3, 2011
21 Day Organization Challenge with a bowl full of lemons! - Part 1
Alright, so I told myself January was going to be ALL about organization!! What better way than to dive right in and take the 21 day challenge with a bowl full of lemons. This girl is seriously organized! So here I go...
Day #1
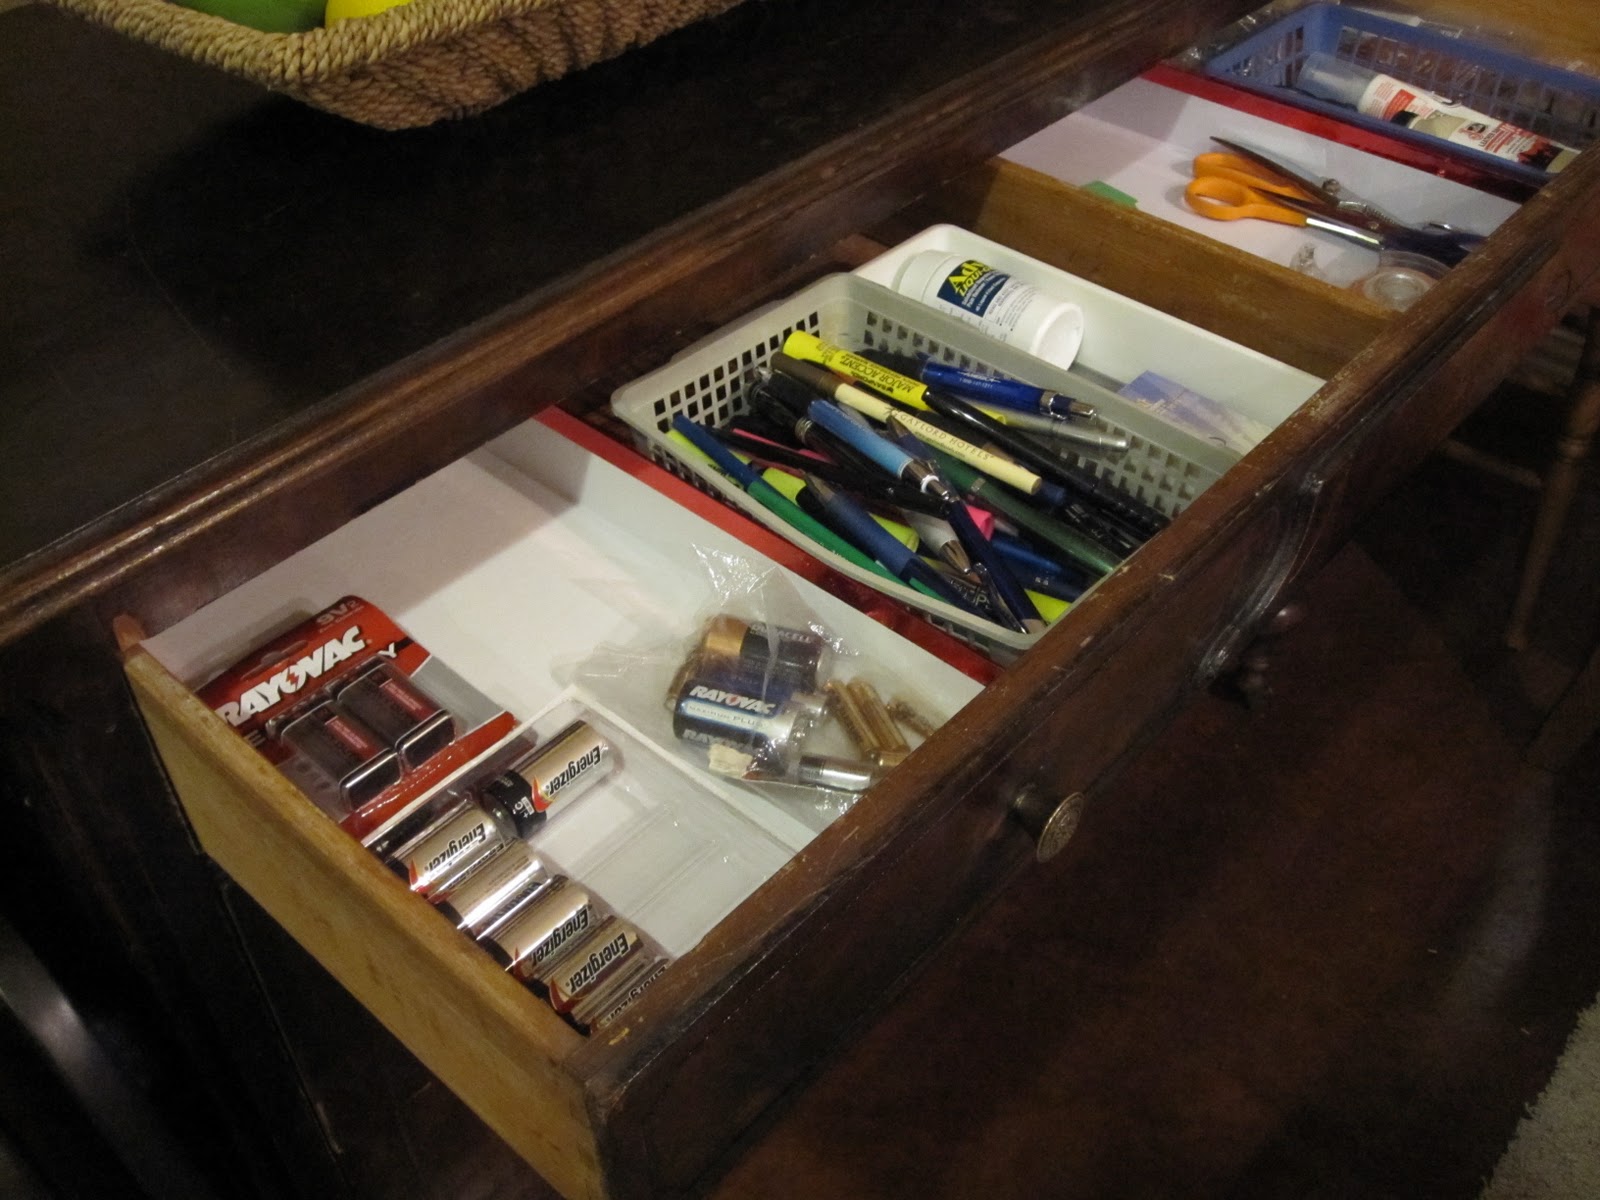
Me vs The Junk Drawer
I'm a little reluctant to post this for the world to see... It's not pretty....
As I wrapped up my junk drawer organization project I was singing the Hallelujah chorus in my head!
Here is my after pic:
Day #2
Desk Organization
I actually get a pass for today since my hubby works from home and he doesn't want me organizing his things!
The Tupperware Cabinet
While I was out buying containers for my next challenge, I saw a book called "Organizing for Dummies". I didn't buy it (although I probably should have). But I thought I would start sharing a tidbit of what I'm learning from each challenge (mostly for me to go back and remind myself!).
So, my tidbit of the day: Containers are absolutely essential in organization! I guess I've just always been too cheap to buy them, but I've realized they are important, and really not that expensive if you think a little outside the box. I was at Bed Bath and Beyond and saw a tupperware lid holder for $4.99. Granted that isn't too expensive, but still seemed like a lot to me for something that was going to hold my tupperware lids, so I opted to keep looking.
I stopped by Walmart where I found this fantastic ice cube bin for 1.82. It works perfectly for my tupperware lids! I was super excited about my find.
I also found these other great bins for $4/each at Walmart. I love that they have handles so I can pull them out easily.
Everything fits perfectly in the space.
Day #4
The Linen Closet
Alright, so before we get into the embarrassing pictures, I'll let you know my tidbit for today: Keep everything up off the floor. I found some nasty dust bunnies at the back of my floor clutter! But... if you're like me and run out of shelf space, at least stick all the floor items in bins so you can pull them out to vacuum. I actually have a box of small items that don't have any other home but the floor of this closet. They will be making their way back in as soon as I have a large clear bin to put them in.
So, here is my before picture...
And the after... (see the nice open space to the right - that's getting filled with a bin)
Such a good feeling - nice, neatly folded, pretty towels!
Day #5
The Kitchen Sink
Thank goodness it was an easy one today!! Despite waking up at 4:45 with a bug I was able to conquer today's challenge.
Okay, so my tidbit for today: When you're out shopping, ask yourself, "does this something have a home?" I obviously have needed to ask myself that more than a few times. Some people buy office supplies... some people buy shoes... seeing my 2 of everything - I obviously buy cleaning supplies.
Alright so my before:
I must admit that today was an easier day because my hubby is taking up half the cabinet with our reverse osmosis system. I found a whole new love for that thing today!
And the after....
I always breath a huge sigh of relief when I see the after pics.
Day #6
The Dresser
I have to say that today's challenge wasn't too bad, mostly because I desperately need to do some laundry! :)
I owe today's tidbit to my dear husband. When we first got married I thought it was SO strange that my hubby rolled his clothes. I'd seen rolled towels (for decoration of course) but had never seen rolled clothes! Where have I been??? It makes total sense - less wrinkles, you can fit more in, and better yet you can see what you have! I fell in love with this new (at least for me) method and we use it all the time! Aren't they awesome?
So here are the before pics:
Excuse my toes...
And the after pics:
We definitely have enough socks! Here's the other sock drawer.
You will have to trust that I did the others... I'm going to leave my secrets a secret...
The Pantry
I must confess I started on this one a little early. I knew it was coming... and I knew it was a BIG one! Our Pantry was a little out of hand!!
All I hear when I look at this next picture is Joey Lawrence's "Whoa"
But I did manage to get in my contact paper. That was a feat in itself...
This will be my tidbit for today: If anyone has any pointers let me know! This is definitely not the easiest stuff to work with. At least it's forgiving!! After trying a different method for every sheet I put down, I finally asked for my hubby's assistance. This is definitely easier with two people if you have large sheets. At first I tried to stick one side down to the shelf before pulling the back off. This proved to me a HUGE mess. I found it's easiest to pull the entire back off before attempting to stick any of it down, line the sheet up with your front largest edge and press that side down first then work your way to the back. I actually used a wrapping paper roll to push down to get out air bubbles. Then I went back and pulled up each side individually to get out any remaining bubbles. It turned out so nice, and then I saw this at the House of Smith's and immediately wished i would have done it her way! Oh well another day!
Day #8
The Coat Closet
Today wasn't too bad! I rearranged a few coats, threw away a couple boxes and hangers and voila! By far the least time I've spent on a challenge to date!
Here are the pics:
I don't really have a tidbit for today, but I will share something I've learned from this whole experience. After the pantry project I realized I've bought a lot of things that I didn't even really need. For some reason today, my mind wondered back to college and the business theory that you don't want your money tied up inventory. I had a light bulb go off today! Our funds are tied up in inventory! I've realized that when you're organized you don't buy things you don't need, because you know what you have at home!! Brilliant concept I know... Ha!
I'm LOVING opening all the doors/drawers from last weeks challenges and seeing everything nice and neat though!!
Day #9
Toys
My little man is still 9 months old, so the toys haven't had a chance to get too out of hand yet.
99.9% of the time, my living room looks like this:
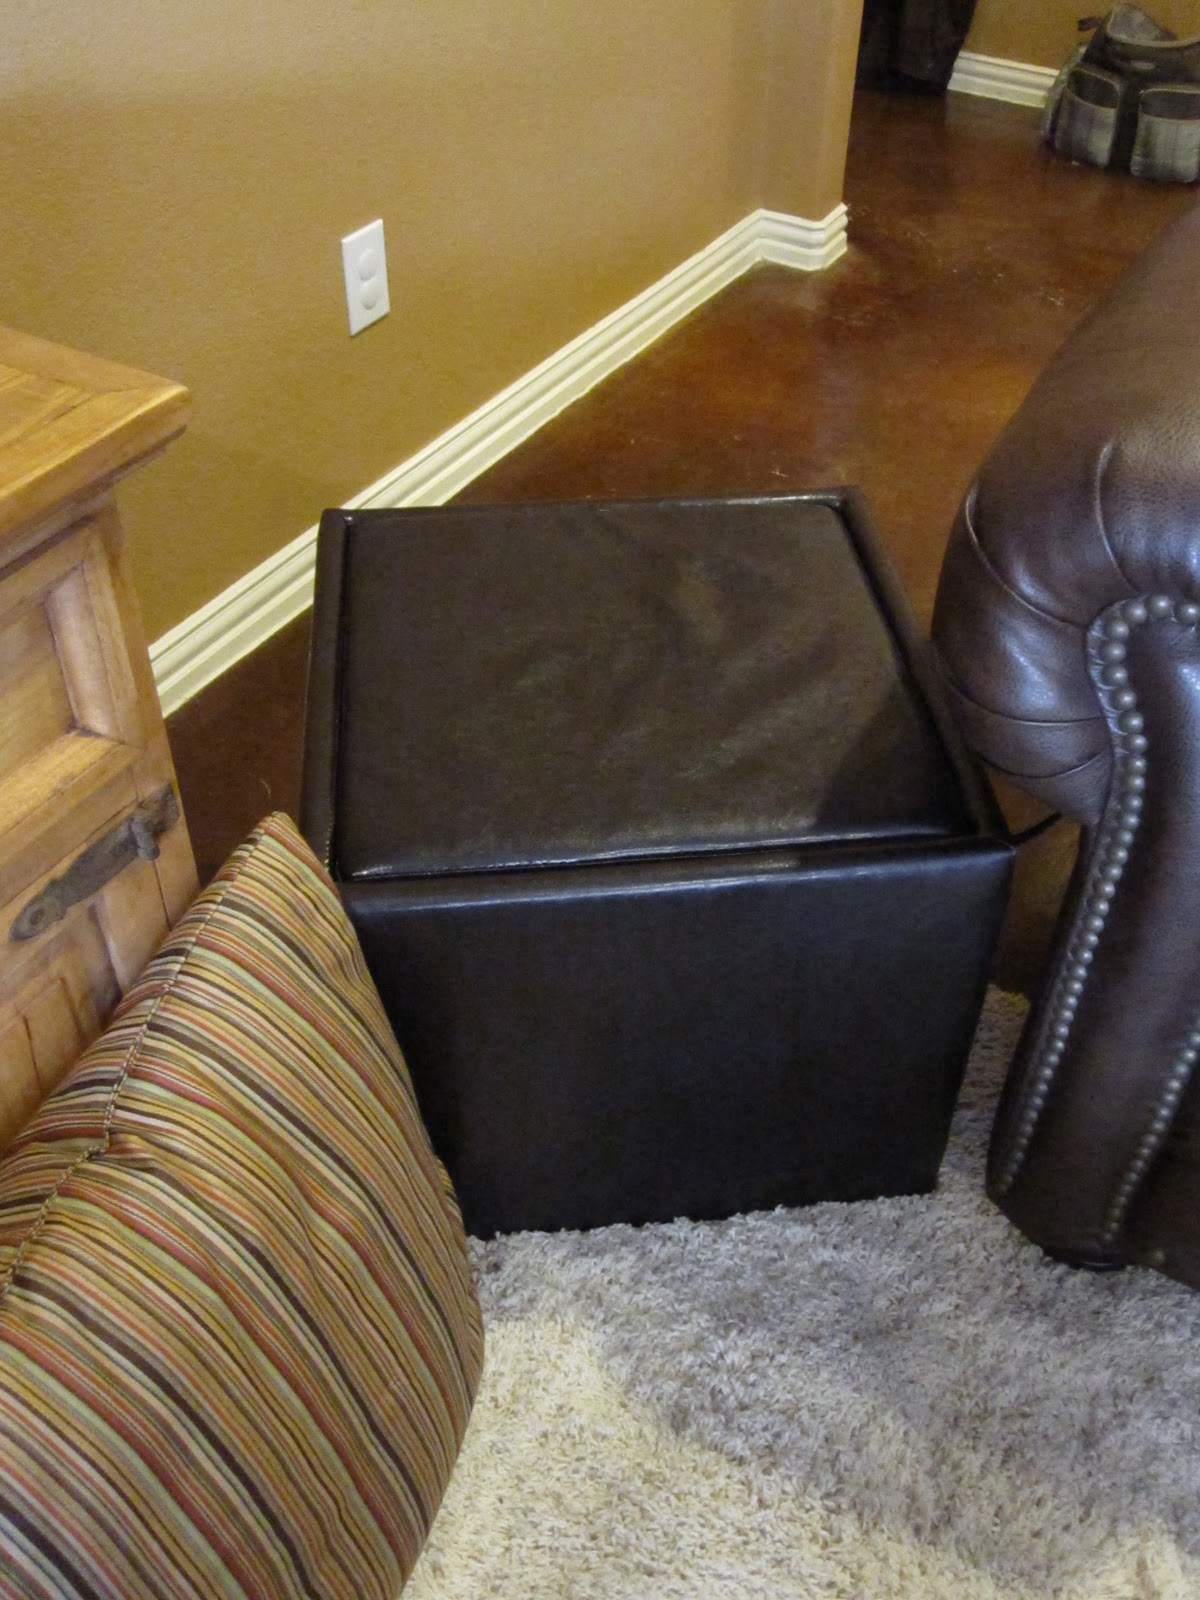
This is the current playroom and where we keep all the toys. There isn't too much organization going on here, but our current system (if you can call it that) works rather nicely. I purchased these storage cubes from Wal-mart. I LOVE them. They were $35 each, and they are such a great quality. I've looked since we purchased these and typically these run around $75. I'm very happy with our purchase. They actually hold all the little man's toys, AND they serve as a baby gate! Woo hoo!
When he's in bed, or we're having guests over they hide the clutter and look nice too! We move them to the center of the room and use them as ottomans/coffee table (the lids actually flip for a hard surface).
So, today I spent my day moving the furniture and doing some much needed deep cleaning in this room.
Okay, so I don't have a tidbit for today, but I'd like a tidbit from you! How, how often, and with what do you clean your kids toys? Being a new mom, I'd love to hear your answers! :)
Day #10
The Laundry Room
Oh the cleaning supplies! Oh my goodness!! I'm exhausted after this one just thinking of all the cleaning I have to do to use all these up! I know, I know, I really should give some of them away. Anyway - here is the before picture. It doesn't look that bad because I forgot to take it until after I'd cleaned up some of the right side.
And the after...
My tidbit for today: This is something I just recently started doing - the basket on the dryer. I decided to use a cute basket and leave it on top of the dryer. If I take a load of laundry out, and don't have time to fold it, it goes in this basket instead of on our couch! So far it's worked out pretty well!
Subscribe to:
Posts (Atom)