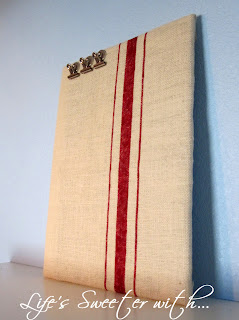
I fell in love with this red feed sack message board from Wisteria ($69).
Wisteria
I actually hadn't even heard of Wisteria until recently! They have some really super cute things!!
Here's how I made mine, for about $7!
Home Depot carries these great sheets of galvanized metal ($4).
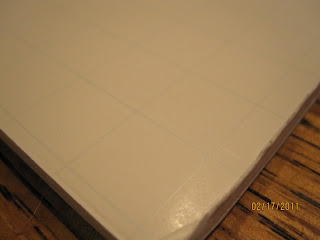
I wanted to make it a little thicker, so I mounted it onto a foam board with hot glue. I found the foam board at the dollar store - 2 for $2.
I cut the foam with scissors. An x-acto knife would probably work best, but I've seemed to have misplaced mine! The foam board I bought actually came with grid lines so it made it easy to cut it evenly.
I used my thread pull technique to make sure the burlap was cut perfectly square.
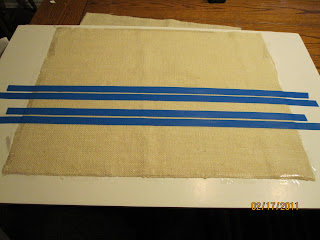
I used the second foam board as my guide and laid the painters tape making sure they lined up with the grid lines. They were not perfectly spaced, the main thing is to just get them totally straight. The grid lines helped tremendously!!
I used a dry stencil brush and stenciled on some red acrylic paint. I'm impatient so I pulled the tape off before it was totally dry. I was super careful, but I probably should have waited until it was dry. It could have been a disaster!
I love the way it turned out!! Here are a couple more pics!
I'm a big fan of the rustic look with the clean silver magnets!


What a very clever message board and I love it! Just to let you know that my lemon trees aren't real but I made them look real by potting them in some soil and a cute pot. I love them by my bed though and it would be great to smell the lemons every morning! Thanks for your nice comments!!
ReplyDeleteI just bought some burlap! I used it on my blog for a knock-off lamp! Now I know what to do with the extra! Love your blog!
ReplyDeleteGreat post! Making it yourself is so rewarding...you saved some money!! Way to go!
ReplyDeleteI love the stripes with the burlap. Very fun, cool project!
ReplyDeleteWhat a cute blog. Thank you for sharing your project. It turned out great. I'm your newest follower. It would be great if you could stop by my blog Monday and add your project to The More The Merrier Link Party.
ReplyDeletehttp://diyhshp.blogspot.com
I love the look of that ... it's so crisp looking. You did a great job!
ReplyDeleteVisiting from The Shabby Chic Cottage.
lovely! we made some pillows that have a similar look - out of drop cloth & fabric paint!
ReplyDeletethreesisterz.blogspot.com
Very creative!
ReplyDeletewww.dashing-home.blogspot.com
I love the look of this!
ReplyDeleteI love love love this! Great job on this project. Thanks for sharing.
ReplyDeletehttp://itsybitsypaper.blogspot.com
I featured you this week in my Hookin Up with HoH party!
ReplyDeleteFeel free to stop by and grab a button. You earned it!
~Allison @ House of Hepworths