Showing posts with label Quick Crafts. Show all posts
Saturday, November 19, 2011
Christmas Recipe Card Holders
I made one of these Recipe Card Holders about a year ago and thought I would make some more this year! Our church actually did something pretty neat this year called a reverse offering. With the money I received I made these Recipe Card Holders and am selling them for $20/each. 100% of the proceeds will be given back to the church and goes towards missions, rehab projects in the community, and other ministries through the church. They did this last year and it was great to see how God multiplied the money given!!
Send me a message if you are interested in purchasing one and we will work out the details! Or if you are crafty and would like to make your own check out the tutorial here!
Sunday, October 2, 2011
Free Applique Patterns
I love applique shirts/onesies! They are so fun to make for gifts and holidays. There is a great website that has free applique patterns. Check it out at freeapplique.com. I'm getting in the Christmas spirit and they have some awesome Christmas patterns!
I figure I have a short window of time to dress the little man in applique shirts, so I am trying to get it all in while I can!
Love the little Christmas Tree! (excuse the tacky blue background - I should have taken the pics someplace other than the ironing board! ha!)
And nothing says boy like an airplane! Check it out at Whos So Cute Designs on Etsy!
Here are some of my others favs I found online. I saved these over a year ago, so I don't have the sites to reference. If it's one of yours let me know and I will absolutely add the link! Sorry for not having those, but they are just too cute not to post!
I think these elephants are just darling...
LOVE this one for Christmas.
Check out this super cute turkey from KinderCuts on Etsy! So cute and you can buy it already pre-cut! Definitely worth the money if you're short on time/fabric choices!
Thursday, July 14, 2011
Chenille Burpcloths, washcloths and oneside to match!
One of my favorite things to make are baby gifts!! My sister in law had a little girl this past week named Ella. Such a sweet name. I made her a chenille burpcloth, a few washcloths and a matching onesie of course!
You can read about how to do the applique and embroidery in a previous post here.
I just recently learned how to make these chenille burpcloths and washcloths. I didn't use the standard measurements. I actually made these for a few different people so I measured the fabric and figured out how I could get the most out of the yard. Chenille is a little pricey so I didn't want to waste any. I actually used an excel spreadsheet to figure out the dimensions! ha!
First, cut out your pieces. One way to make sure your pieces match up perfectly is to use the floral piece face down on the chenille fabric and cut using the first as a pattern. I unfortunately did not use this technique and my pieces didn't match up perfectly.
Sew three edges and an inch or so on either side of the fourth edge. Flip inside out and sew around the entire edge. This makes the edges lay nicer.
Voila! So super easy and so cute! It took me one day of naps to finish all of it and clean up! Not too bad!
Tuesday, February 8, 2011
Nursery Shelf and Storage Baskets
As my little man grows, so do his things! We desperately needed some additional storage in his room, and a place to keep a few things out of his reach. I decided to add a shelf with some fun little baskets over his changing table.
Here's how it all came together:
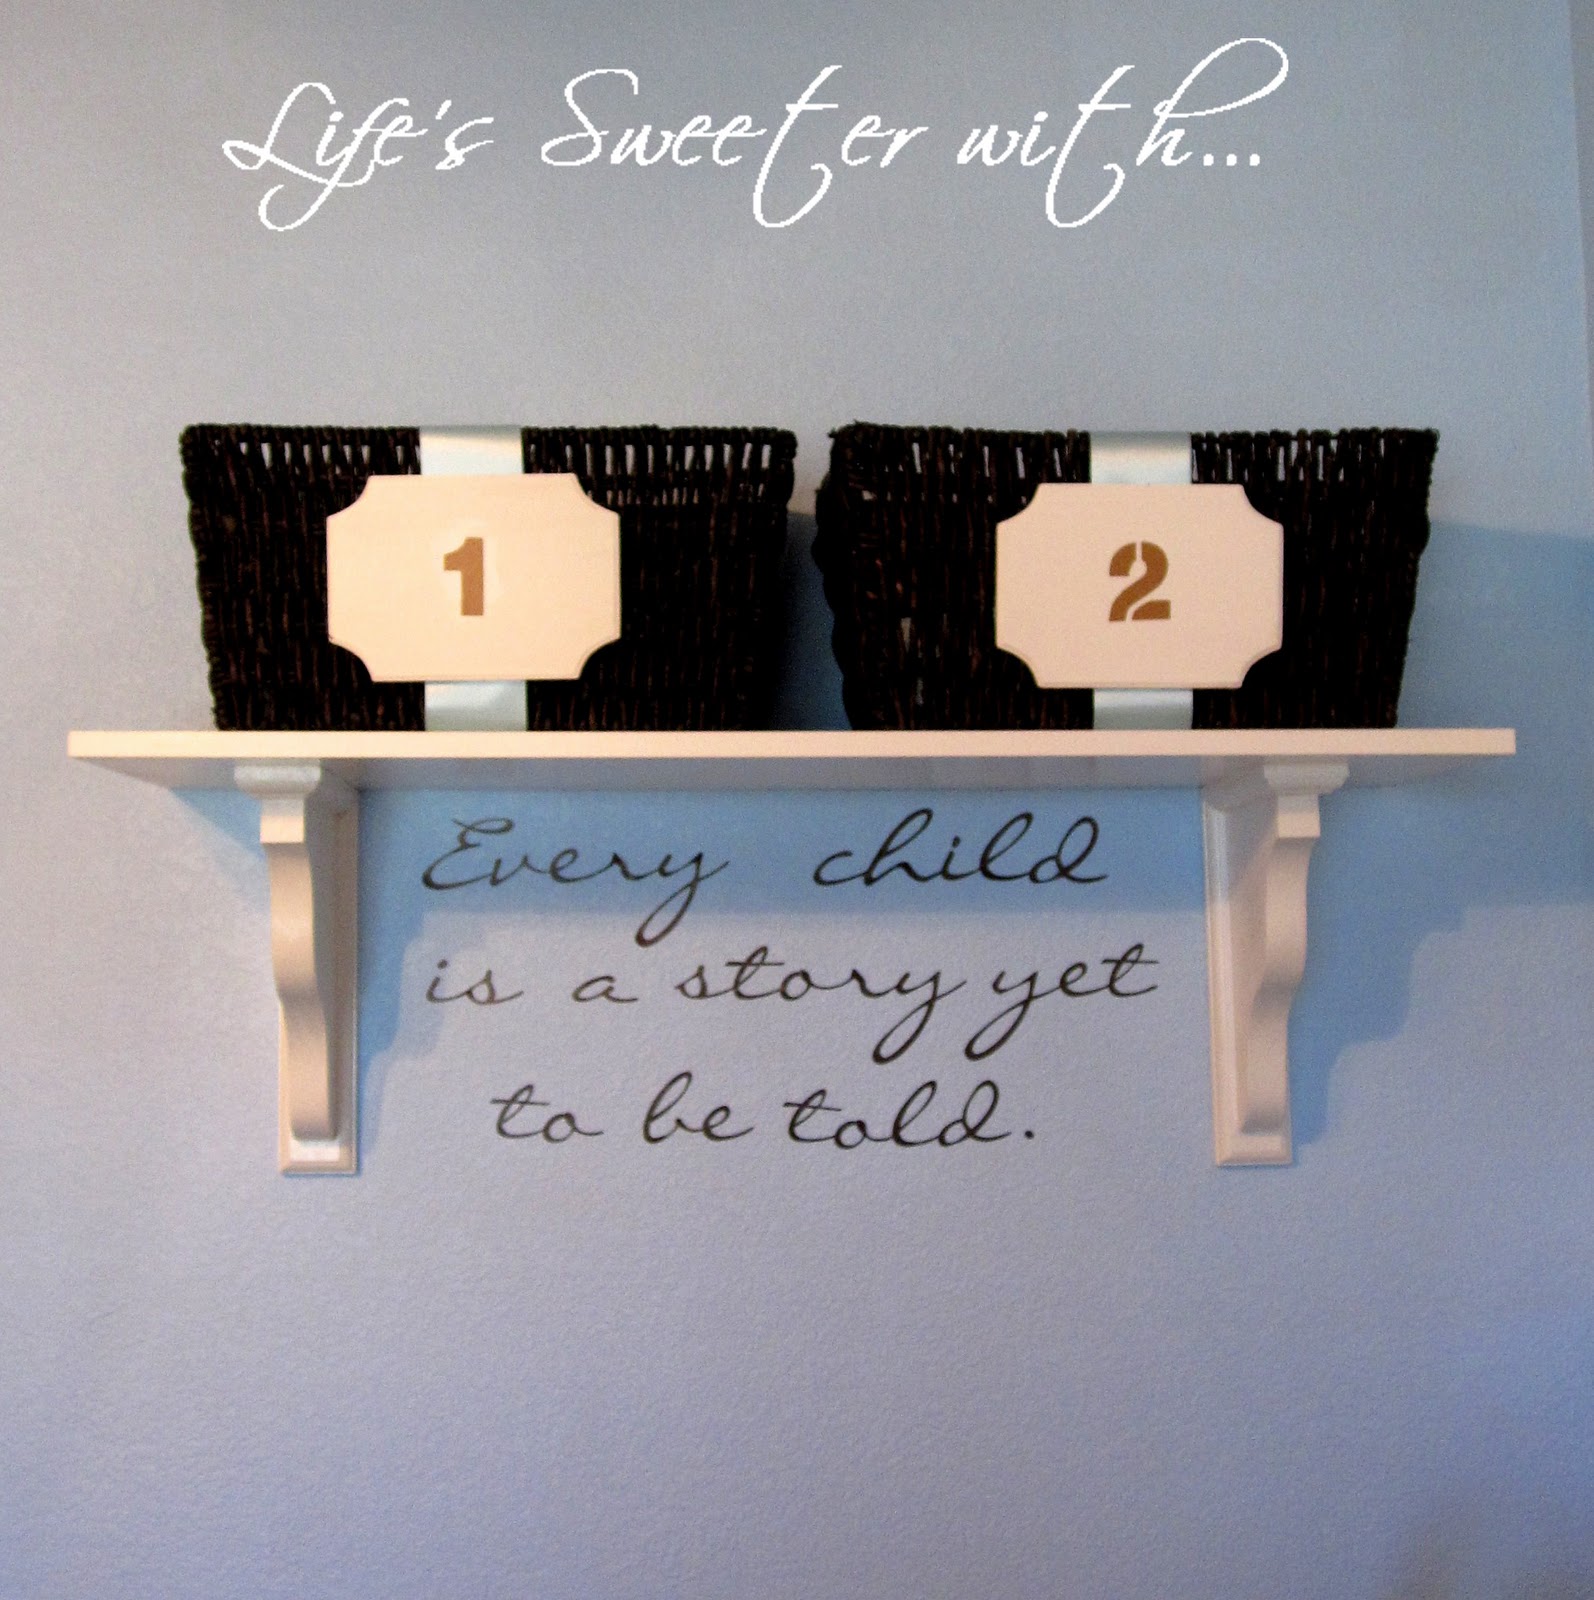
I purchased a 12" x 36" wall shelf board from Home Depot for about $7. Their wall shelving boards come in a variety of lengths and (a bonus) they're already white! I also found these great corbels for about $8 each.
The corbels came ready with mall mounts already installed on the back. There are some that come without the wall mounting, so I had to search for these. They are approximately 10.5" x 9" x 2". The corbels are attached to the board with liquid nails and then a couple nails through the top for added security.
I feel guilty even telling you what I paid for the baskets! During Michaels Dollar Days all their baskets were on sale. I just happened to find the last two baskets in this style - they were clearanced out for $.01 each. Yes $.01!!! I asked the lady 3 times if that was right. She said it was! What??? I SOOO wished they had more! I would have bought as many as my car could hold!
The ribbon ($5), plaques ($1/ea), and stenciles ($4) came from Walmart. I gave the plaques a once over with some white acrylic paint and attached them along with the ribbon with hot glue.
I used the inside of the stencil (since I didn't have the right color paint to stencil them on), and glued them with some Mod Podge.
Total cost of the project was about $35!
While I was at Home Depot I also spotted this great stuff!!
So fun!! I keep trying to figure out a project that I need some of this for!
For now I will just enjoy my extra storage! Here are some additional pics:
Monday, January 31, 2011
Wall Mount Flower Boxes
I am working on our Master Bedroom right now and wanted to come up with something fun and unique for the walls. I came up with these wall mount flower boxes. They are super cute and add just a touch of femininity without adding pink (which my hubby appreciates)!
I found these great apple green hydrangeas at Michael's Dollar Days for $3 each (usually $5.99).
The galvanized metal bins are also from Michael's. They are $5.99 each but I had a 40% off coupon! woo hoo! Love that! I started out searching for a metal "something" that would hang on the wall but soon figured out I'd have to make my own. I decided hot gluing a tooth hanger was the easiest method. These metal bins can be used for so many different things, so I didn't want to do anything too permanent. Not the prettiest method, but it worked! Here's what it looks like:
I trimmed my flowers down (I did leave a little to bend on the end for more stability). You can also use a little bit of styrofoam to help hold them in place.
They needed a little something extra, so I added some stick on numbers to the front.
I thought about stenciling the numbers, but decided I would rather leave it flexible so I can change them seasonally if I want. I just used some stick on letters that I had. They were red, so I painted them with some acrylic paint and stuck them on!
The whole project cost me less than $30 and they are just so cute!!
Friday, January 21, 2011
Knife Block Facelift
Thank you HOH for this awesome project!!! Love it!!
I was so excited about it I almost forgot to take my before picture. I wasn't about to put all the knives back in, but you get the idea. Average... boring... knife block...
Fill in the logo with wood filler. I actually did this step a few times until I couldn't feel any grooves with my finger. Then sand off the excess so you have smooth finish. This pic is before I sanded.
Then I painted with Rustoleum Heirloom White from Home Depot... so purdy!
I ordered my vinyl from the fabulous Shelley at Wonderfully Wordy. She is awesome if you don't have a silhouette machine and need vinyl! It was $3 including shipping. I ordered it in my current fav - apple green!
Voila! No more boring knife block!
Wednesday, January 19, 2011
Knock Off Pottery Barn Acanthus Pillar Holders
I am so excited about this project! Mainly because it didn't cost me a thing! Woo hoo!
I was searching Pottery Barn the other day and came across these Acanthus Pillar Holders. I just LOVED them and decided I needed some for my master bedroom!
I actually lucked out and had some wooden candlesticks around the house (left over from our wedding). I purchased them at Garden Ridge a few years ago. The tag on the bottom says $14.99, but I think they were on sale when I bought them.
I almost forgot to take a before pic, so here they are about to be spray painted!
I spray painted them with Rustoleum Heirloom White from Home Depot.
I waited about 15 minutes and took some 80 grit sandpaper to them! The paint was dry to the touch, but I think it helped that it wasn't totally dry all the way through.
Love them!
Subscribe to:
Posts (Atom)