Tuesday, December 27, 2011

Paint Colors!


Paint is definitely on my list of favorite things!  I love how it can completely transform a space.

I found this picture on Houzz and loved it!  I wanted the majority of the house to be this color.  It's the perfect greige!  I found the closest thing I could to this color - Behr Castle Path 730C-3.


For the Dining Room I wanted to do something light and airy.  I love blues and reds together.


My inspiration for the dining room was this picture I found on Houzz.  I chose Behr River Rock 730E-3.


I've always had chocolate brown in our Master, but wanted to do something totally different!


I chose to go with yellow and grey!  We are going with Behr Gray Timberwolf 760E-3. 


For the Master Bath I wanted a smoky blue color.


I love this bathroom, but it's a littler darker than what I wanted.


Love this one too!  I found a good mix between the two with a little more of a blue tone Behr Blue Fox 540E-3.


I am a big fan of Behr paint and primer in one.  Typically with paint colors I have been told to buy one to two shades lighter than what you want it to be on the wall.  However, since Behr's base is white I've been told to go one shade darker.  That's what I did with all of these colors.  We painted the main part of the house today and it was the perfect shade!  Yay!

Monday, December 26, 2011

Popcorn is DONE!!!

Popcorn is done!!!!  These are not the greatest pics.  Still in major construction mode, but we have made SO much progress.  It is a lot of work but definitely worth it!!

They are painting the ceiling (they will be done with that today) and then we will start painting the walls!  Here are a few of the before and afters:

Before:


After:


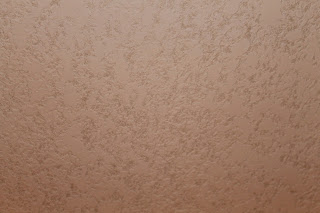
Here is a close up of the texture before paint:

Before:


After:


Wednesday, December 21, 2011

House Update: Popcorn Removal


Popcorn removal has begun!  It's really hard to capture on camera exactly what popcorn looks like, but I tried to get a couple good pics of the "before". 


We'd originally planned on Handy Hubby conquering this job himself.  I will say after stopping by the house a couple of times I am glad we left this one up to the professionals!


Wow it is a LOT... I will repeat A LOT of work...


You'll notice the tape and plastic... and paper covering the entire floor.


They were wrapping the stairs when we stopped by.  Taping off the downstairs was one day's worth of work.  One whole day just for half of the prep work!  Wow!  I think this job is probably 75% (or more) in prep.


Once they had the kitchen scraped we had a good friend come in and repair the dry wall where the island light fixture will go.

Looking much better than the big hole that was there!!


So here is the process they used for the popcorn.  They prepped with tape, plastic etc, then they scraped the majority of the loose popcorn off, went back and lightly sprayed the ceiling with water and scraped the remaining popcorn off.  Which turns into a big goopy mess on the floor!


Right now it looks smooth just like there was never anything on there to begin with!  Amazing!!


The last step is to apply the knockdown texture.  Basically they spray on the texture and then use a trowel to create the knockdown effect.  Check out e-how for a more detailed explanation!

They should be done by Friday and then the real fun will begin - painting!!  Can't wait to show you the before and afters!

Sunday, December 18, 2011

Installing Kitchen Canned Lighting and a Small Update


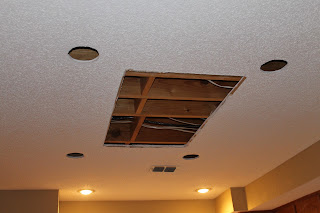
Today Handy Hubby and his handy electrician friend worked on installing canned lighting in the kitchen!  I have no pretty pictures for this and absolutely no expertise in this area.  Pretty much all I will show you are a bunch of holes in the ceiling!  But those holes mean progress!!

So the first thing they did was measure.... and measure again.... and measure again.  Their motto - measure three times cut once.  They actually used a jigsaw (in the last house hubby used a drill mounted hole saw).  Either way the holes were cut and perfect!


Here is one of the lights installed (they scraped some of the texture to do this - not a problem since the popcorn starts to come down tomorrow!).


All four lights installed!


They also worked on installing a ceiling brace for the light that will be installed over the island. 


All in all a successful day of work in the kitchen!  Here is how we left it today...


And because I can't leave a post without something pretty in it.  Here is a small update I worked on today!


Notice the stained glass above the door? It really had me fooled the first time I looked at the house.  It's actually just a window film!  It's a really genius idea, just not really my style.  Thankfully it was an easier fix than replacing the entire window!


I was amazed at how much this changed the look/feel of the room!  There is so much more light with it gone!  Makes me want to do a happy dance!

Another before...


And after!  Look at the gorgeous view that was hiding!! 


Saturday, December 17, 2011

Dining Room Buffet Free Find!


What an exciting day!!!  Driving through the neighborhood today I spotted this beauty!  I immediately called Handy Hubby and told him I was swinging back around to pick him up because I needed his help loading!  He sort of rolled his eyes but came along anyway! :)
 

And guess what!  Totally free!  It also came with two matching mirrors.  So beautiful! 
 

Check out the detail on this thing!  Did I mention this was free?? Okay now to the important part.  What color to paint it??


I immediately thought of this white piece, which I love!  I think it would really make the details stand out.


BUT our dining room will look very similar to this piano room over at HOH.  I'm worried about the white on white.  SO...


I found this one that I think may work better with the rest of the room.  And I really LOVE it too!

What do you think??

Removing the Fluorescent Light Box in the Kitchen!


We got a lot accomplished today at the house!  One of the biggest things we wanted to get done was removing the light box in the kitchen before they start working on the popcorn Monday.  This was actually a pretty simple project (easy for me to say as you will see my job pretty much consisted of taking pictures and giving some unsolicited advise! haha).


Here she is.  Complete with popcorn and all.  Take a good look... yes the light fixture was sitting completely diagonal inside the box.


First Handy Hubby popped out the plastic cover. Easy peasy.


Here is a much better view of the crooked light.  Maybe there's a purpose for this... or maybe not... 


Next Handy Hubby removed all the metal flashing around the box.


Here is a picture with flashing removed.


He used a box knife to cut around the top edges and removed the sheetrock etc.  


Here's a picture with the first board removed!  Sweet victory!


And here it is the finished product.  Beautiful I know!


It makes the room look so much larger! (sorry for the dark pic and the mess)  One more time here is the before...


And here is what will be taking it's place!

Can't wait!!

BTW - here is a good article on removing the light box from e-how