Showing posts with label Home Improvement. Show all posts

Tuesday, February 28, 2012

Dining Room Buffet Table Free Find - It's finished!


I am very excited that the buffet table for the dining room is finally painted!!  Okay so first we handy hubby did a light sanding, primed and we handy hubby actually sprayed the whole thing.  Spraying was a HUGE lifesaver.  Can't imagine having to paint all this detail by hand!

'
I left the hardware the original color.  I went back and forth on this, but I really think it gives it more of an Old Worldly look.

And since everyone loves a good before and after...


Can you believe someone gave this away?? 

Monday, January 16, 2012

Red Dining Room Mirror


I am doing a lot of unpacking right now, but the hubby and I took a break to conquer a small project!


My mom had a lovely gold mirror that she graciously donated to our project.  I've heard that gold is making a comeback, but I decided the dining room needed a little bit of a bolder color!


The first thing we (actually handy hubby) did was tape and cover the mirror.  He's so awesome.  :)


All taped and ready for painting!


We primed...


And then painted it red with a satin finish spray paint.


I also purchased two lamps from Marshall's for $29/each!  Can't beat that!


Now for some other accessories...  I really like this planter box from Shanty 2 Chic.  Maybe in white??


Also, a big thanks to Whitney at Shanty for the red inspiration with her red photo wall.  Love!


I also really like this flower box from Thrifty Decor Chick:


But for now I am just enjoying the pop of color in the dining room!


Wednesday, January 4, 2012

Paint - Before and Afters


Painting is done!!  I can't believe how different the house looks!  I absolutely love the colors.  You can read more about the colors we chose and the inspiration here.

I wish I had true before and afters.  The before pics were done with a wide lens camera, but you get the idea!

Here is the before of the entry/dining area:


After - Behr River Rock 730E-3 and Behr Castle Path 730C-3:


Before Dining Room:


And After - Behr River Rock 730E-3:


Before Living Room:


And After - Behr Castle Path 730C-3:


One thing we did in Handy Hubby's office is update the moulding around the top.


They had already done the hard part for us - all we did was paint in between to give the illusion of really thick moulding!


I want to do this around some of our baseboards!  House of Smith's has a great tutorial for chunkier baseboards.

Here is a close up!


Also a quick painting tip!

Handy Hubby picked one of these up at the store.  I thought it was a waste of money... until I tried it.  I will never paint without this thing!  We did not tape one wall.  Let me repeat that - NO TAPING!  I meant to take a picture of one of the lines.  It is crisper than with taping and saves SO much time!  This product is well worth the money!  You do have to buy the refills. We found it best to replace with a refill after every room or two but definitely worth it for all the time you save and how easy it is to use!  Genius!

Tuesday, December 27, 2011

Paint Colors!


Paint is definitely on my list of favorite things!  I love how it can completely transform a space.

I found this picture on Houzz and loved it!  I wanted the majority of the house to be this color.  It's the perfect greige!  I found the closest thing I could to this color - Behr Castle Path 730C-3.


For the Dining Room I wanted to do something light and airy.  I love blues and reds together.


My inspiration for the dining room was this picture I found on Houzz.  I chose Behr River Rock 730E-3.


I've always had chocolate brown in our Master, but wanted to do something totally different!


I chose to go with yellow and grey!  We are going with Behr Gray Timberwolf 760E-3. 


For the Master Bath I wanted a smoky blue color.


I love this bathroom, but it's a littler darker than what I wanted.


Love this one too!  I found a good mix between the two with a little more of a blue tone Behr Blue Fox 540E-3.


I am a big fan of Behr paint and primer in one.  Typically with paint colors I have been told to buy one to two shades lighter than what you want it to be on the wall.  However, since Behr's base is white I've been told to go one shade darker.  That's what I did with all of these colors.  We painted the main part of the house today and it was the perfect shade!  Yay!

Monday, December 26, 2011

Popcorn is DONE!!!

Popcorn is done!!!!  These are not the greatest pics.  Still in major construction mode, but we have made SO much progress.  It is a lot of work but definitely worth it!!

They are painting the ceiling (they will be done with that today) and then we will start painting the walls!  Here are a few of the before and afters:

Before:


After:


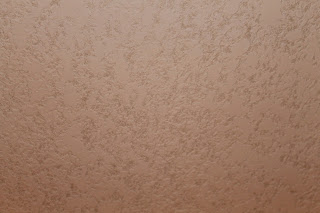
Here is a close up of the texture before paint:

Before:


After:


Wednesday, December 21, 2011

House Update: Popcorn Removal


Popcorn removal has begun!  It's really hard to capture on camera exactly what popcorn looks like, but I tried to get a couple good pics of the "before". 


We'd originally planned on Handy Hubby conquering this job himself.  I will say after stopping by the house a couple of times I am glad we left this one up to the professionals!


Wow it is a LOT... I will repeat A LOT of work...


You'll notice the tape and plastic... and paper covering the entire floor.


They were wrapping the stairs when we stopped by.  Taping off the downstairs was one day's worth of work.  One whole day just for half of the prep work!  Wow!  I think this job is probably 75% (or more) in prep.


Once they had the kitchen scraped we had a good friend come in and repair the dry wall where the island light fixture will go.

Looking much better than the big hole that was there!!


So here is the process they used for the popcorn.  They prepped with tape, plastic etc, then they scraped the majority of the loose popcorn off, went back and lightly sprayed the ceiling with water and scraped the remaining popcorn off.  Which turns into a big goopy mess on the floor!


Right now it looks smooth just like there was never anything on there to begin with!  Amazing!!


The last step is to apply the knockdown texture.  Basically they spray on the texture and then use a trowel to create the knockdown effect.  Check out e-how for a more detailed explanation!

They should be done by Friday and then the real fun will begin - painting!!  Can't wait to show you the before and afters!